So I've been meaning to make a mechanical keyboard for a while, and finally got around to doing it. I had a teensy 2.0 and a bunch of Cherry MX brown knockoff switches lying around, so I just needed to design a board.
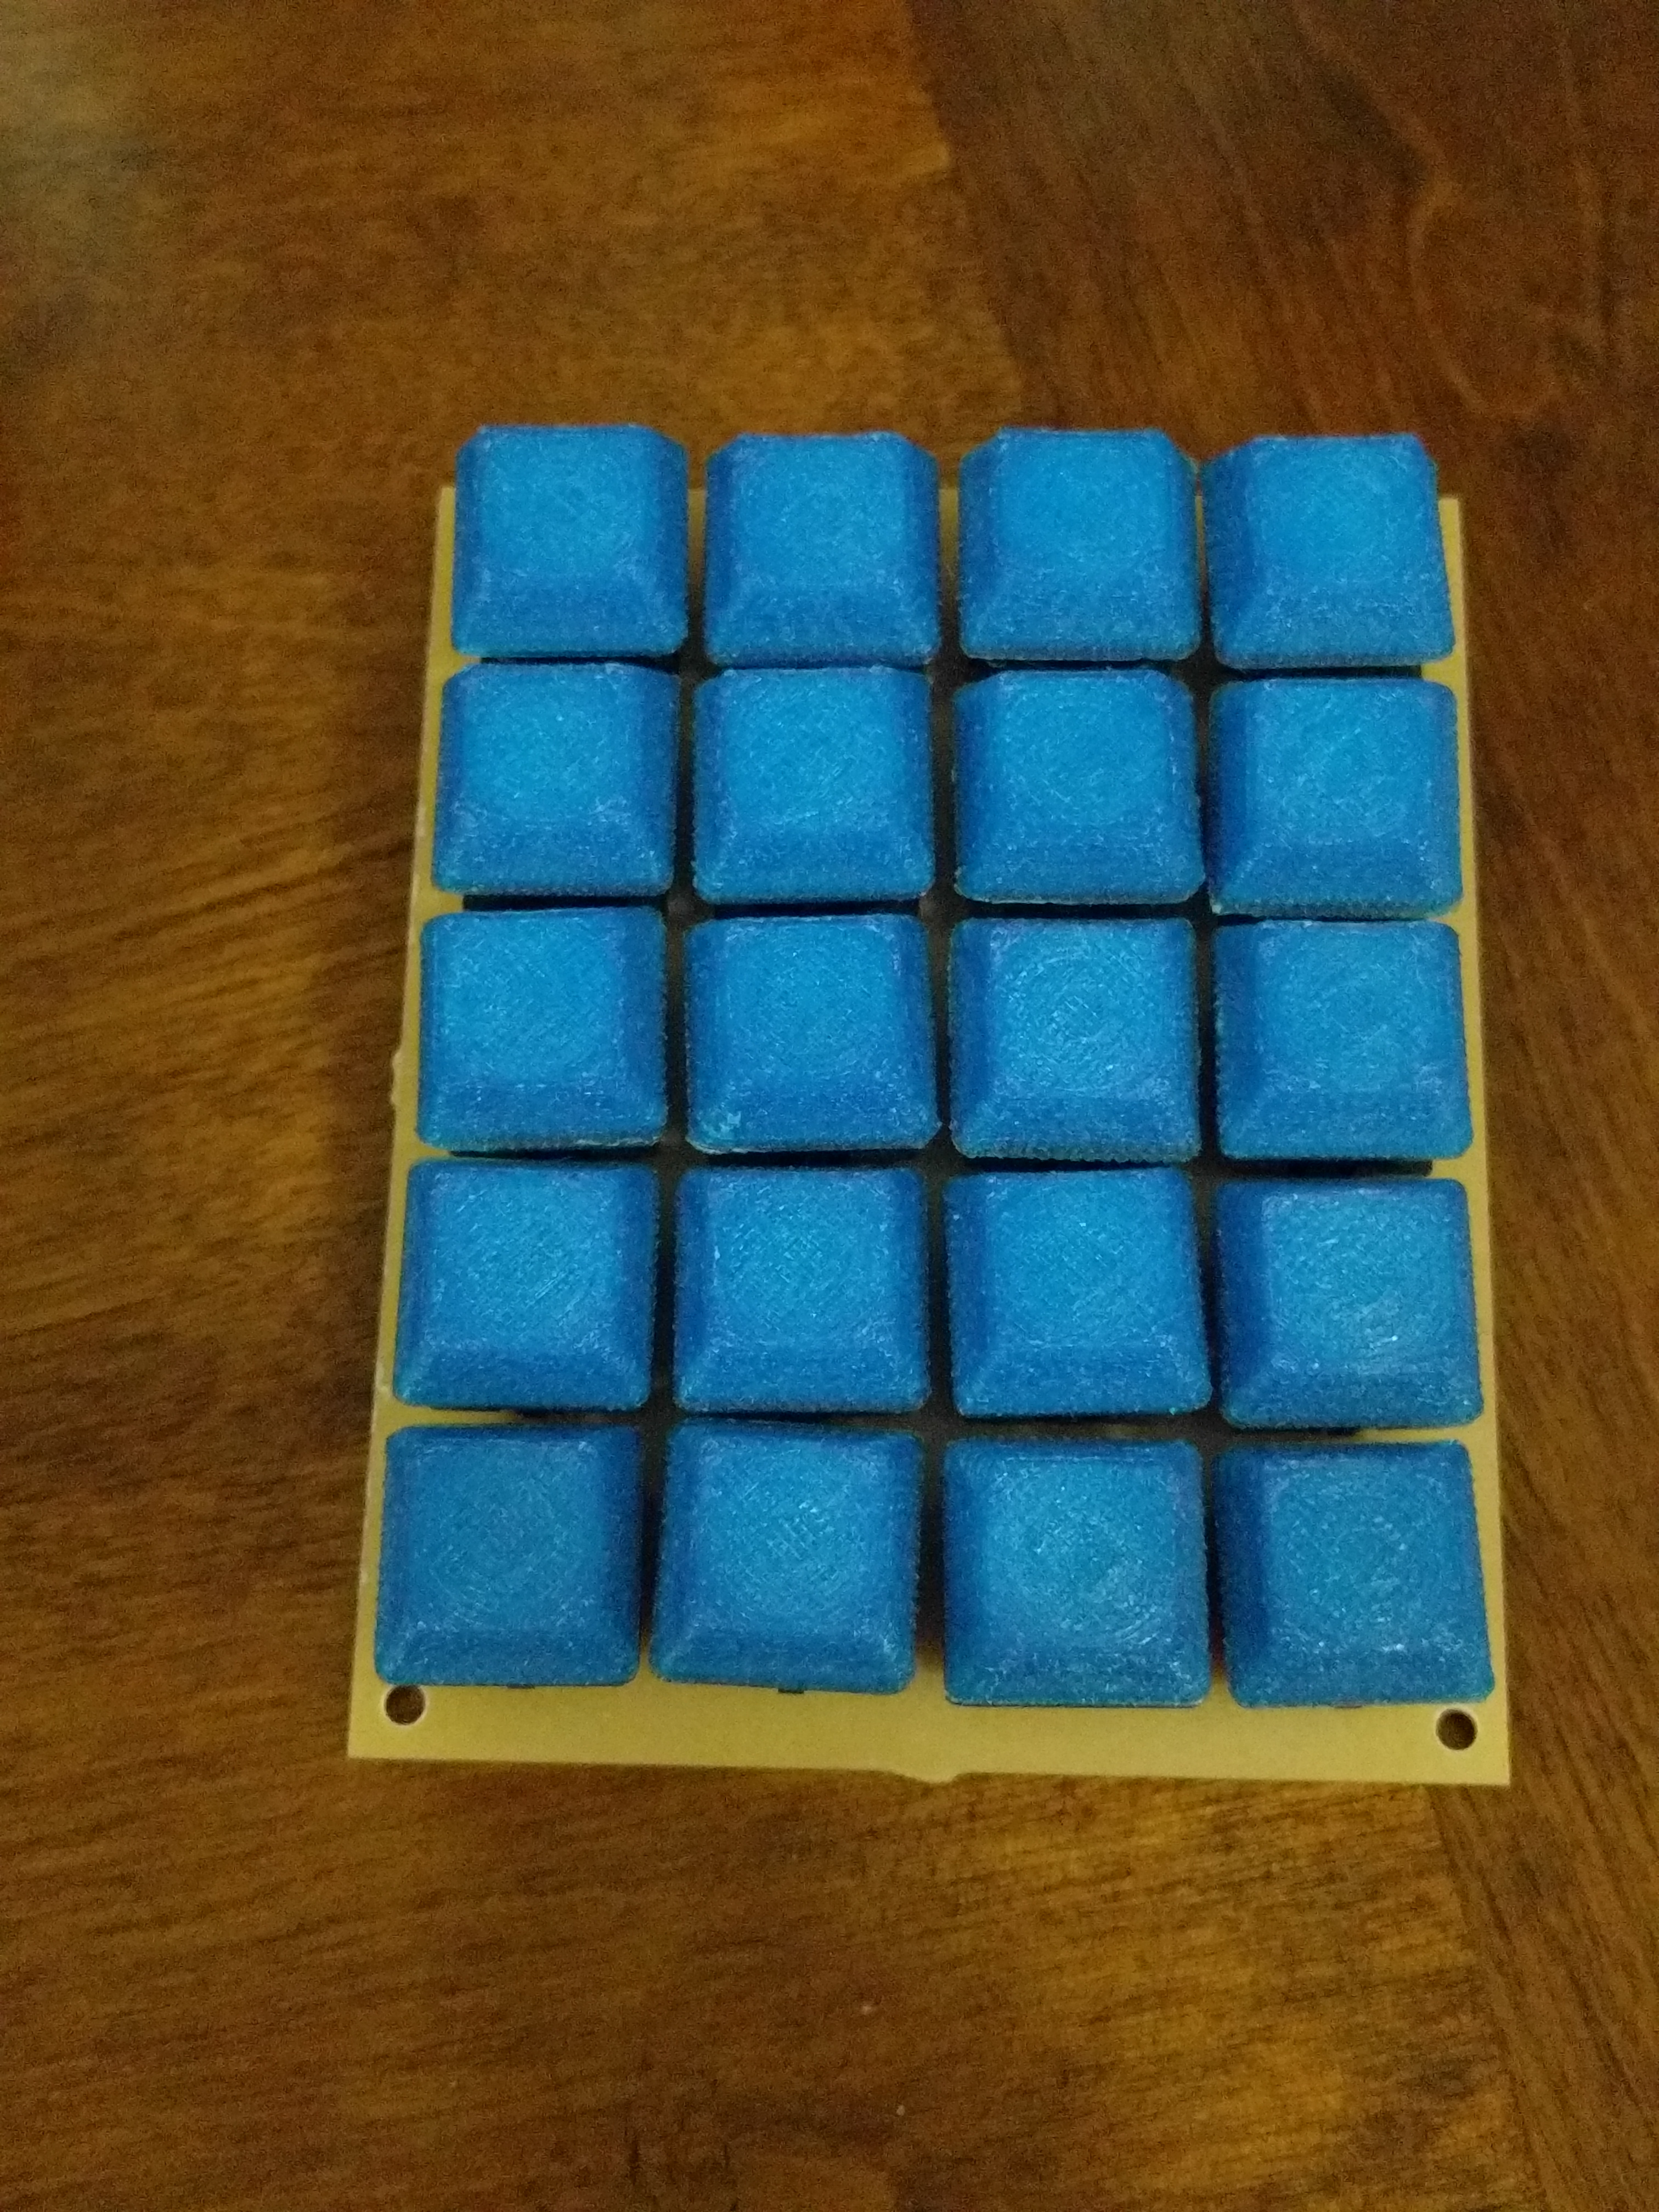
I had previously designed and milled a plate for a 60%ish keyboard out of acrylic, but it was somewhat poorly thought out, so I decided to try something else. I backed the Ultimate Hacking Keyboard a while ago, so I thought I'd make a numpad, since that keyboard doesn't have one. However, I decided to make it just an array of 1x1 switches instead of the normal numpad 1x1 and 2x1 so that it is more configurable. I guess I can 3D print 2x1 caps that span the switches later if I change my mind.
I made my design in a git build of KiCad 5, which was probably a mistake since the build was pretty glitchy, and I couldn't move the project back to an older stable version. I eventially worked around most of the glitchyness by using the standalone versions of Eeschema and Pcbnew, but it did mean I couldn't use the feature I'd wanted, which was the direct loading from Eeschema to Pcbnew without needing a netlist file. Oh well.
So I made a design, fought with software for running my Othermill, and eventially decided to use FlatCAM and CNCjs. FlatCAM was new to me, as I'd previously used Othermill's official software, and while the UI is rather clunky, it did produce good results. I used CNCjs about a year ago, and it's only improved since then.
My first board came out pretty terribly, with too-thin traces and torn-out pads. This was not suprising. I redesigned it with much thicker pads, better routing so that I could use thicker traces, and actually doing the math correctly for my angle bit, so the second time came out much nicer:
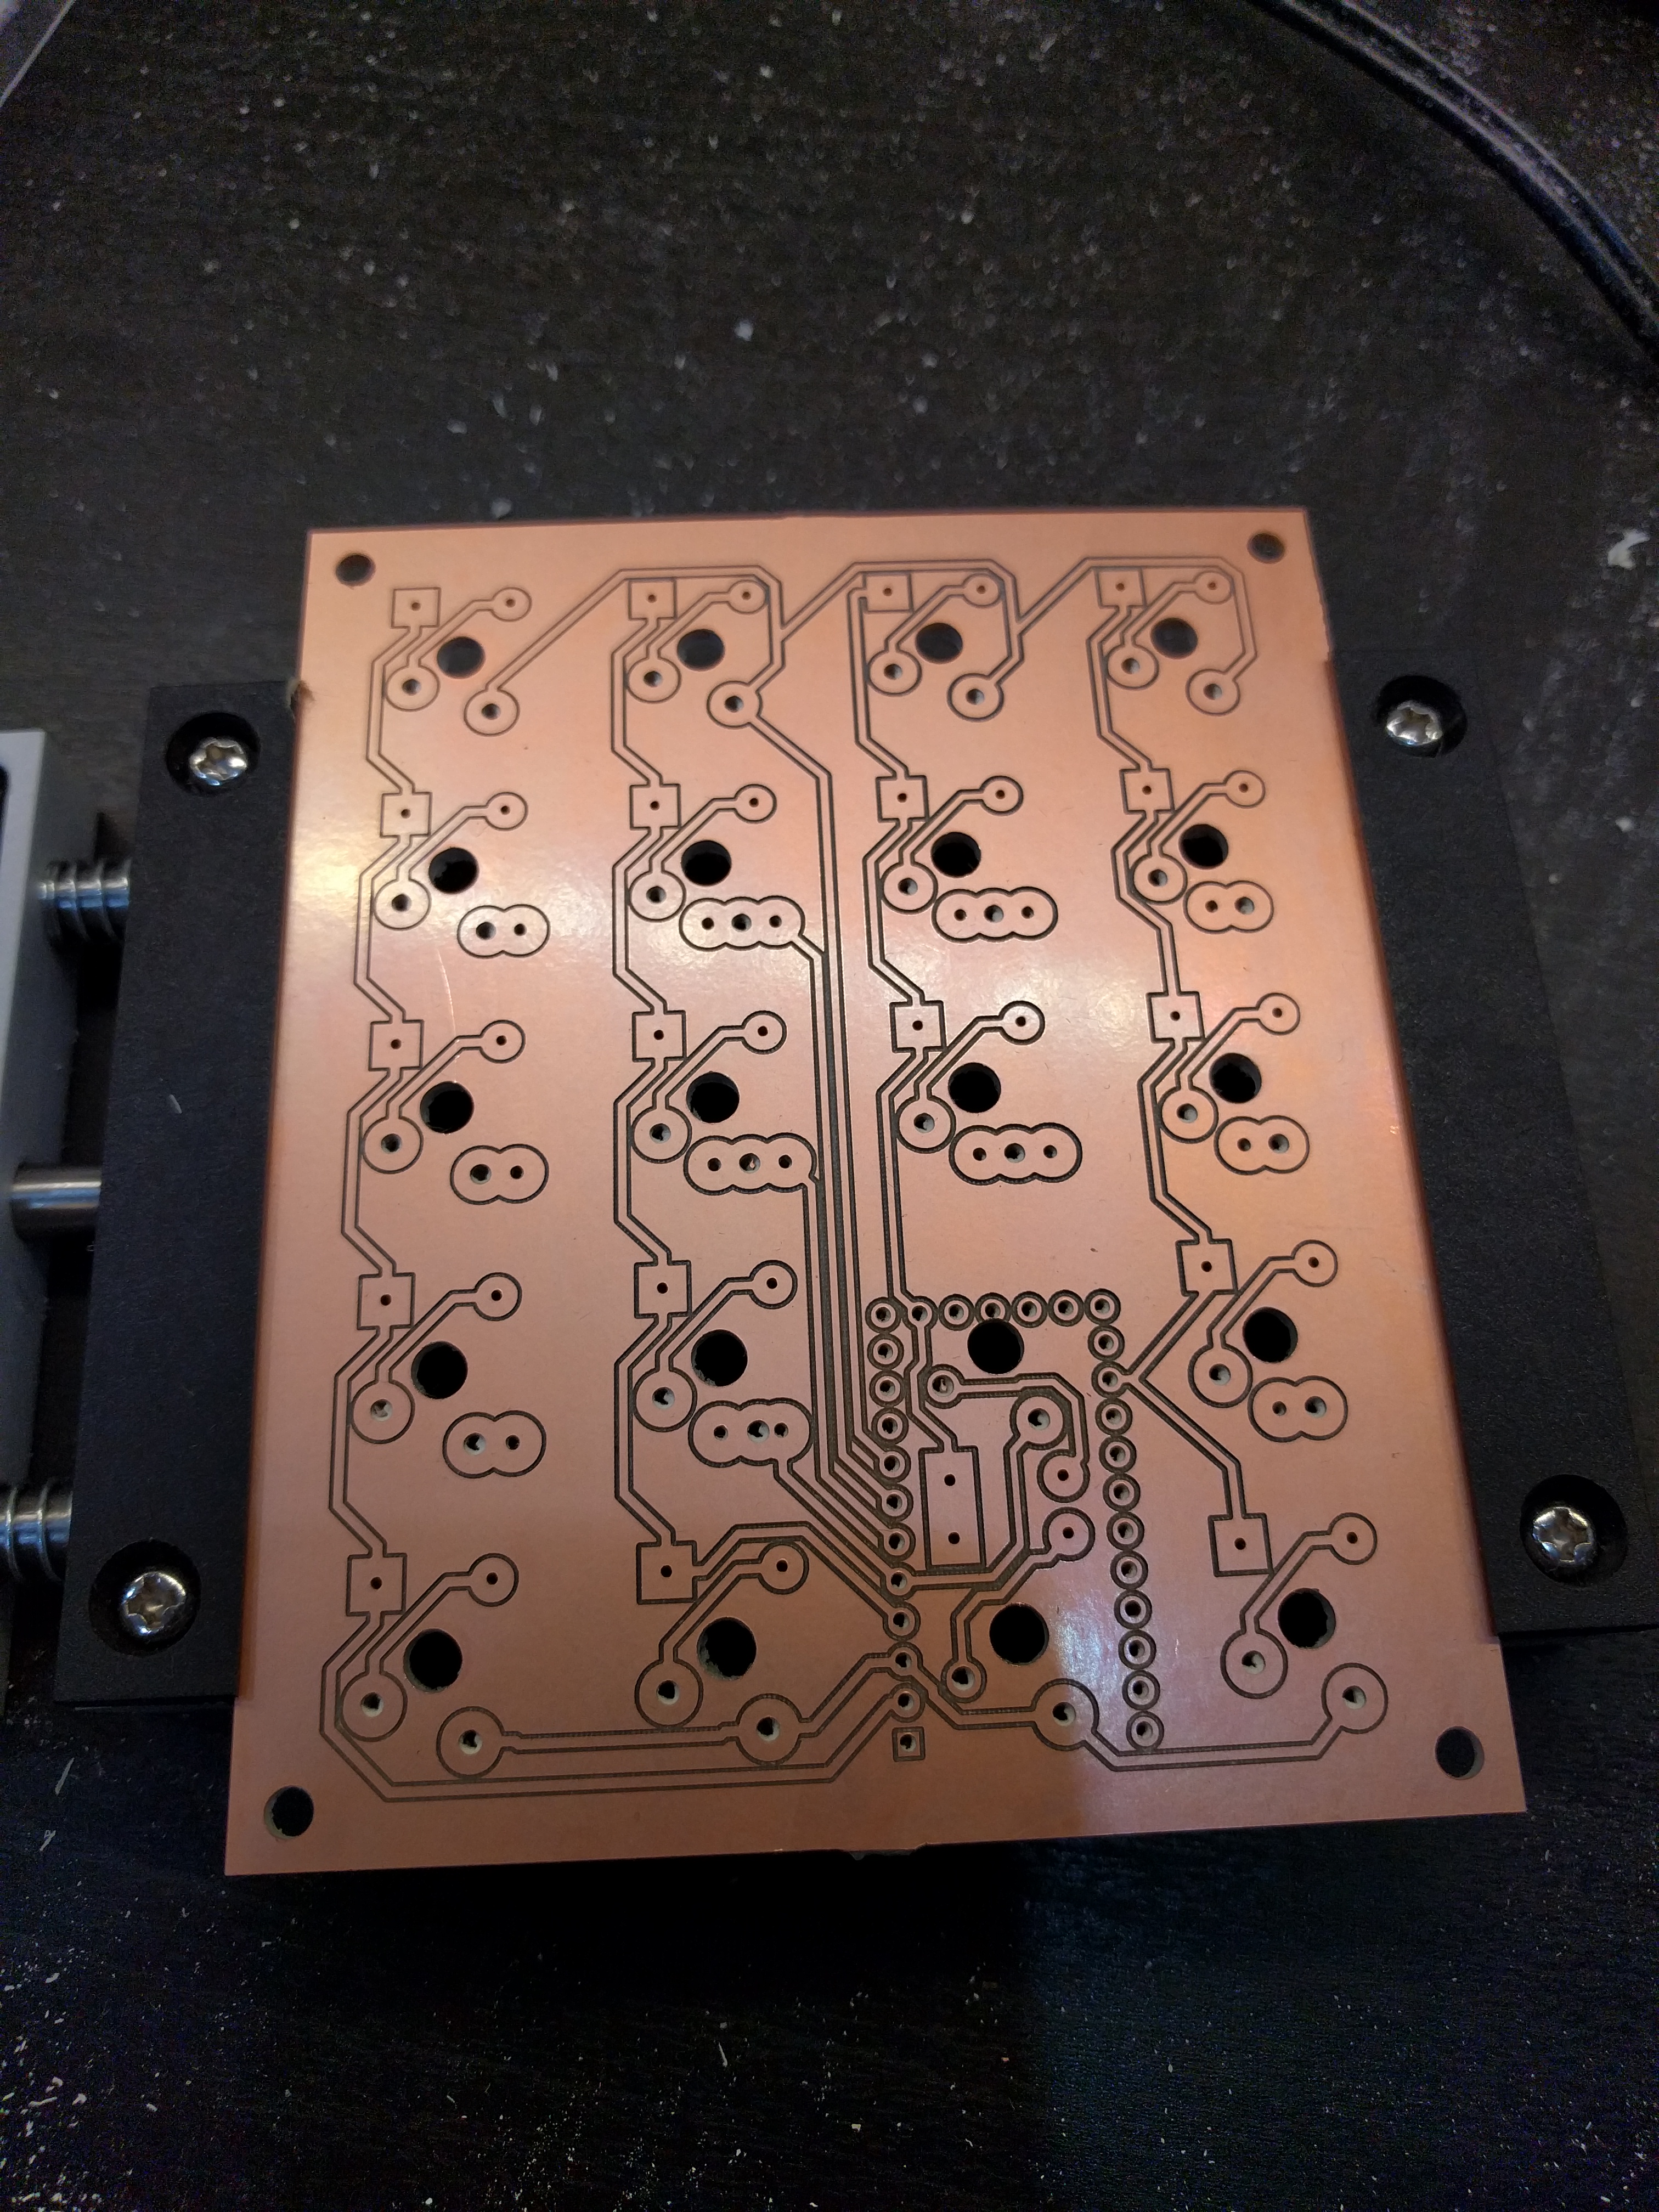

Really, much nicer than I was expecting. Soldering was, however, almost exactly as bad as I expected. This time I'd made the pads a bit too big, so they needed a lot of solder to fill the pad/look good. I was dumb and put the switches in first, so I had to bend/cut the diodes on the first board. My jumpers, despite this, were pretty easy to wire. I also tried to use female headers to keep the teensy removable, which turned out to be both quite dificult to solder, and also much taller than I'd thought. However, it does seem to work electrically, with the exception of one switch, so at least I didn't mess that up too badly.
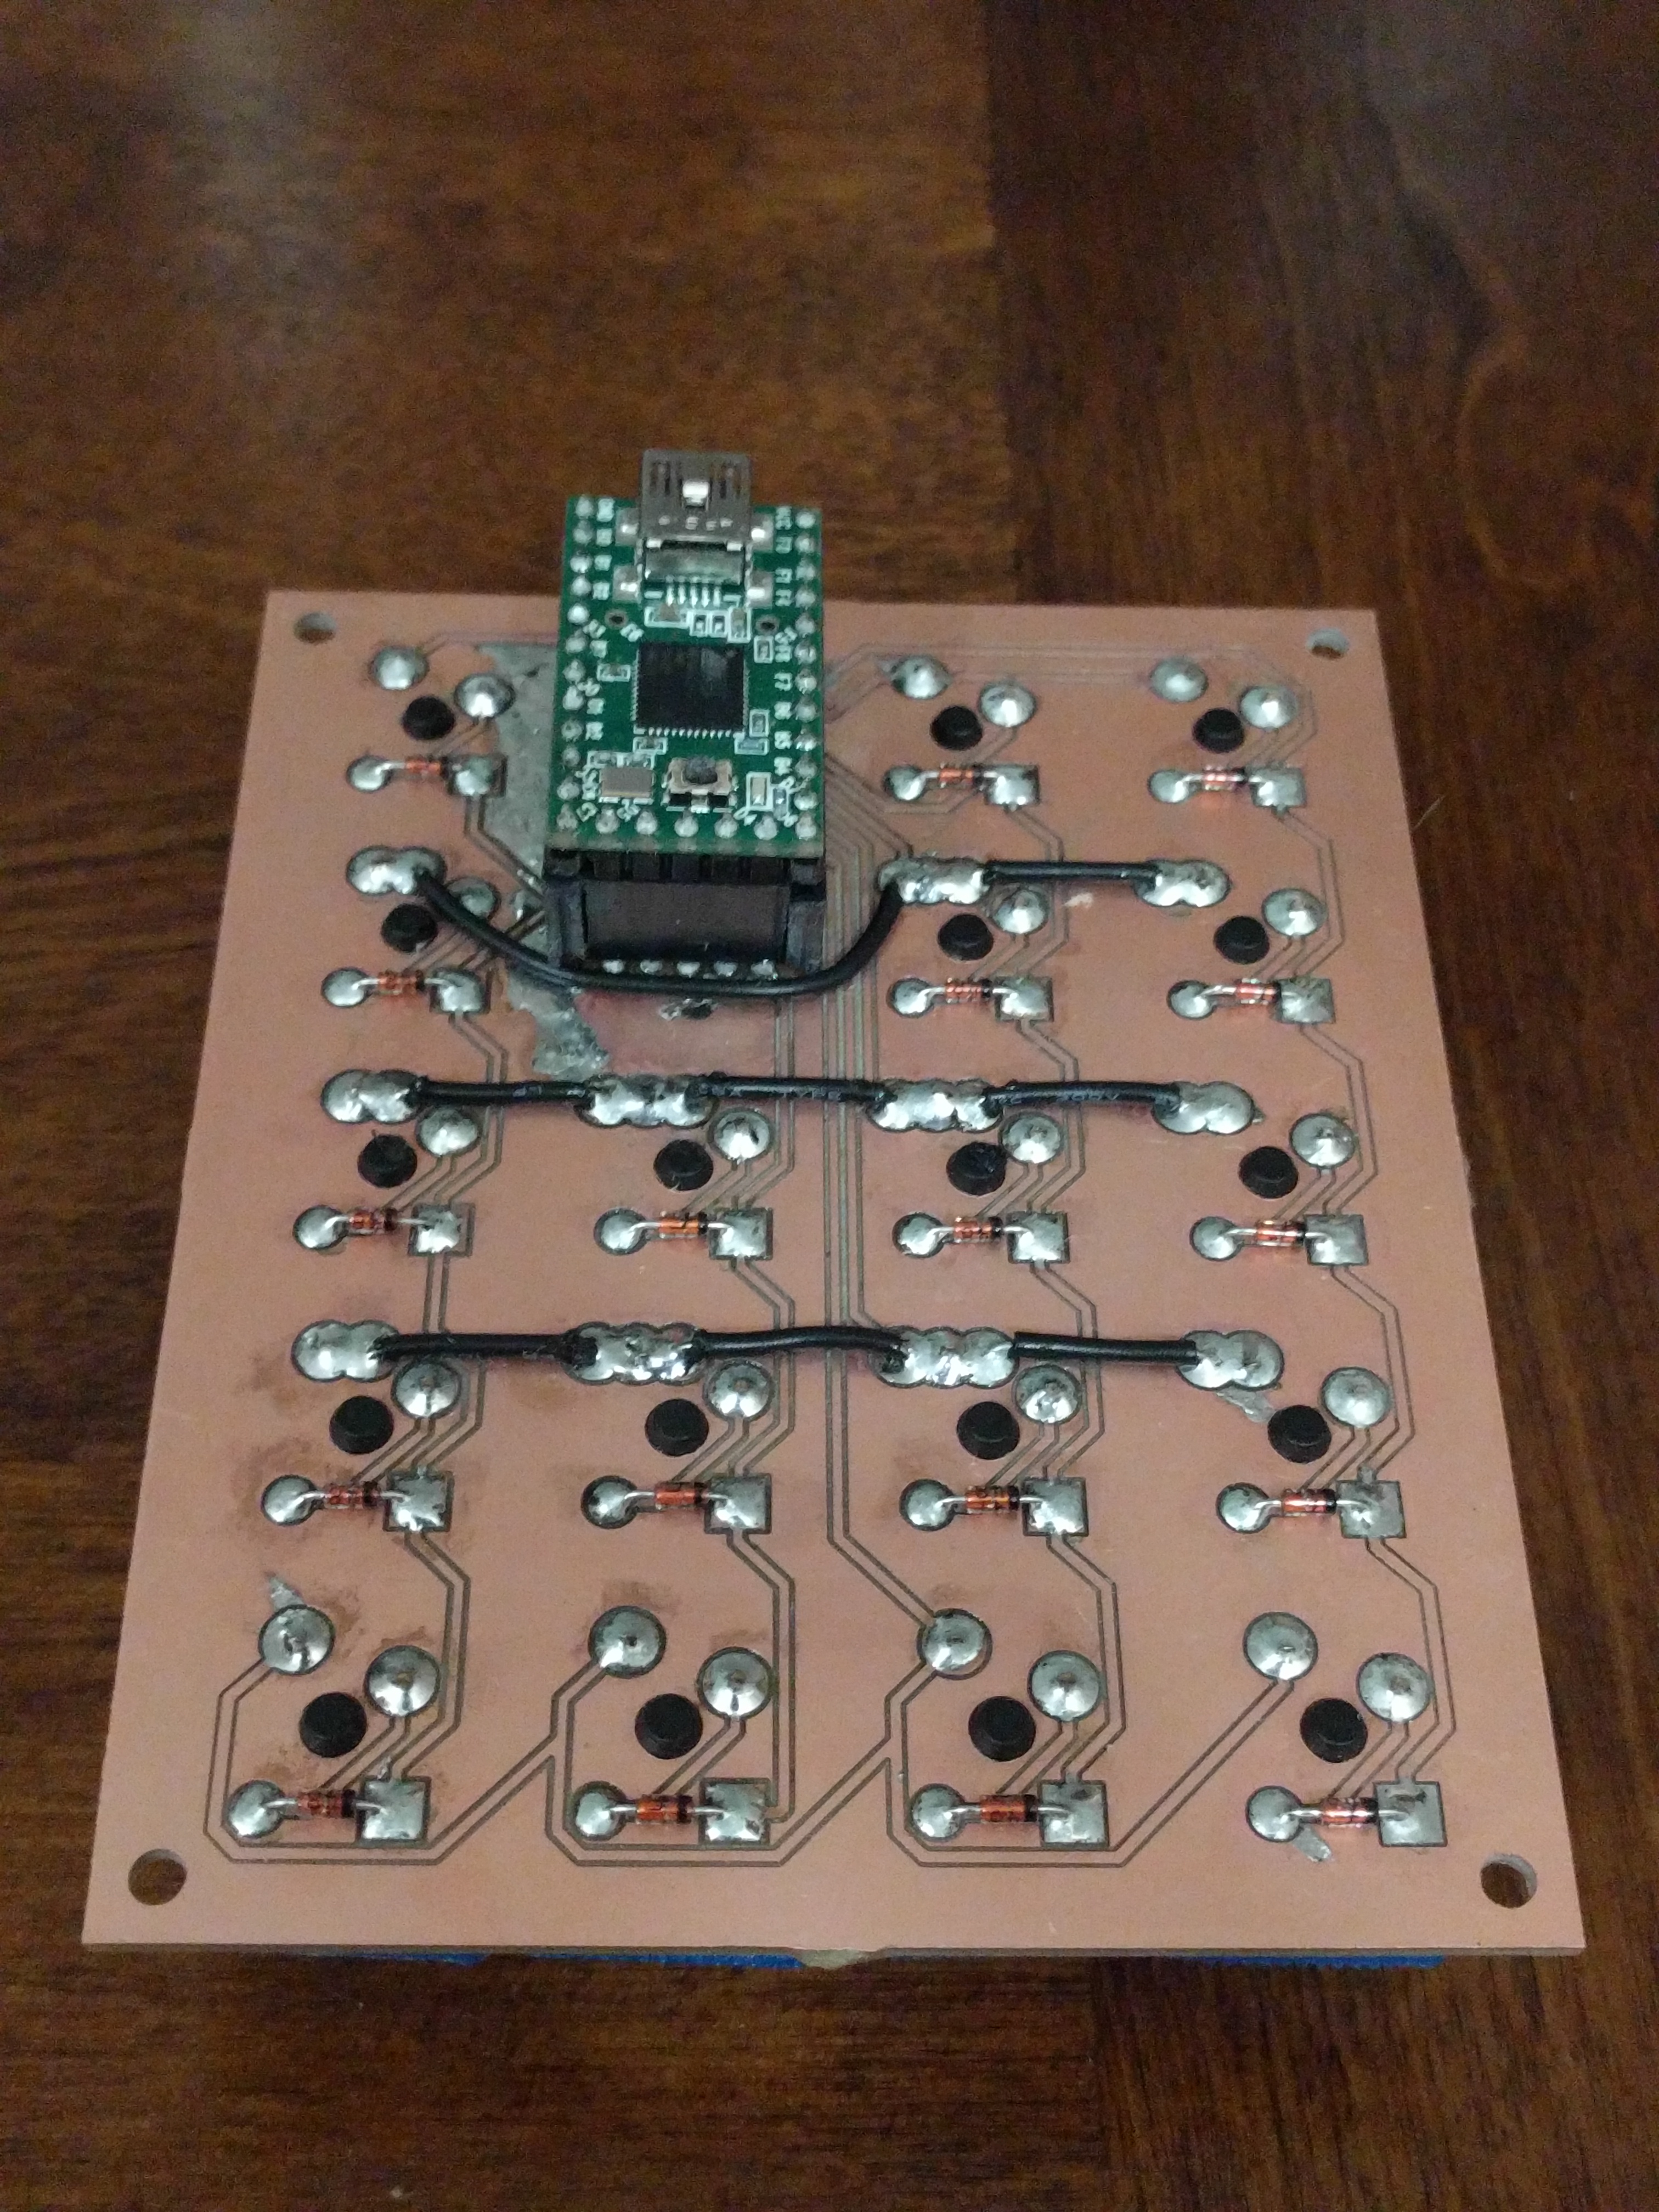
For software, I decided on QMK, a derivative of TMK. I didn't do all that much research, but I don't really need that many features, and someone wrote a relatively simple configurator for QMK. I still haven't really decided on all the layers, but the base is mostly just a normal keypad.
I'm not sure what I'll do for casing. My original plan was milled wood, but with it quite a bit taller than I'd planned, I'm considering just putting rubber bumpers or something and using the angle to my advantage.
So yeah, my first (relatively poorly thought) out mechanical keyboard build. Here are some files, just in case someone happens to want to build this.